If you have a sweet tooth, this easy Caramilk Brownies Recipe is for you!
I’ve jumped on board the Caramilk bandwagon with this easy Caramilk Brownies recipe. I never got a chance to try Caramilk when it was released last year, so when some friends let me know that it was available at our local supermarket, I made sure I got my hands on some!
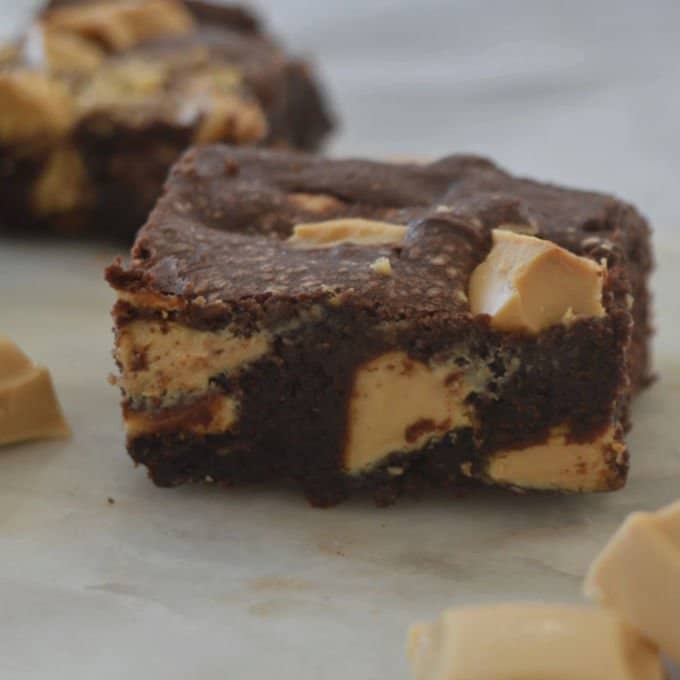
Of course, I tried a little piece of the chocolate first (obviously!) to see what all the fuss was about, and although I find it quite sweet, I do quite like it. I decided it would be perfect to add to my favourite brownie recipe to help break up all of it’s fudgey chocolate goodness, and I think I was right!
This brownie mixture couldn’t be easier to make, it simply a few pantry staple mixed together and then I added around 3/4 of the Caramilk pieces to the brownie mixture and then sprinkled the rest over the top. I had to make this recipe a few times before I was able to get some photos to share here, as it was demolished by the boys and my husband each time I made it! I also have to admit that I sampled just a couple of pieces too 😉
Tips for making these easy Caramilk Brownies:
If you are looking for more Caramilk recipe, check out these Caramilk Chunk Cookies from VJ Cooks or this Caramilk Cheesecake from Just a Mum Who Bakes.
You can also find more easy slice recipe in our No Bake Slices and Bars eBook – also available in a Thermomix edition.
Easy Caramilk Brownies Recipe
This easy Caramilk Brownies Recipe is the perfect simple dessert or slice to enjoy at your next special occasion. It can be made using one bowl and both regular and Thermomix instructions are included.
Prep Time15 mins
Preheat your oven to 160 degrees and line the base and sides of a 20cm square baking tin with baking paper.
Roughly chop the Caramilk chocolate and set aside until needed.
In a large saucepan (you want it to be big enough to accommodate the extra ingredients added later), melt the butter, cocoa and sugar over a low heat – stirring continuously.
Add the vanilla extract and eggs – whisking the mixture as you go.
Sift the flour over the mixture and whisk to combine.
Working quickly, add the most of the Caramilk pieces (leaving 1/4 aside) to your brownie mix and pour into your prepared baking tin.
Add the remaining Caramilk pieces to the top of the mixture and pop into the oven and bake for 35 minutes.
Allow Brownie to cool completely in the tin before removing and then cut into pieces to serve.
You can 1 1/2 blocks of Caramilk chocolate for this recipe if your prefer.
It’s important to leave these Brownie in the tin to cool completely before cutting as this will help it ‘set’.
Thermomix Caramilk Brownies Recipe
This easy Thermomix Caramilk Brownies Recipe is the perfect simple dessert or slice to enjoy at your next special occasion. It can be made using one bowl and both regular and Thermomix instructions are included.
Prep Time15 mins
- 150 grams butter
- 220 grams caster sugar
- 75 grams of cocoa
- 1 teaspoon vanilla extract
- 3 eggs
- 100 grams plain flour
- 180 grams Caramilk Chocolate
Preheat your oven to 160 degrees and line the base and sides of a 20cm square baking tin with baking paper.
Roughly chop the Caramilk chocolate into pieces and set aside until needed.
Place the butter(cubed), caster sugar and cocoa into your Thermomix bowl and cook for 3 minutes, 65 degrees speed 1. If the butter hasn’t quite melted, cook for a further 1 minute, 65 degrees, speed 1.
Add the vanilla extract, eggs and plain flour and mix for 10 seconds on speed 4 to combine
Scrape down the sides of your bowl and add the Caramilk pieces (leaving 1/4 of cup aside) and mix for a further 10 seconds on speed 4, REVERSE.
Working quickly, pour into your prepared baking tin and add the remaining Caramilk pieces to the top of the mixture and pop into the oven and bake for 35 minutes.
Allow Brownie to cool completely in the tin before removing and then cut into pieces to serve.
It’s important to leave these Brownie in the tin to cool completely before cutting as this will help it ‘set’.
This content was originally published here.